
After making the first three starters and Pikachu this model felt a little overdue. I had even been asked by several people “when are you going to make Eevee?” haha. Well, it’s finally here a super cute fluffy little Eevee model in a low-poly style.
Read MoreCreepy and Cute

Fall is here which means that the spookiest month, October, is right around the corner. With Halloween being one of my favourite holidays I decided it was time to make a new decoration for it. I had a few ideas about what to make but eventually decided on a cute little ghost because I realized I could make it cute and creepy at the same time! Which is always fun. I remembered an old optical illusion that would allow me to make a face or pair of eyes follow you across a room and immediately thought “ghost!”
It’s actually a very simple trick. All you have to do is make a concave surface and place an image on that surface. Because it’s concave, although you may move and rotate the surface you can still see most of the image, giving the impression that the surface is shifting to face you. Make that image an eye and it looks like it’s watching you instead!

After some initial tests in blender, I found that making the pupils pop out helped eliminate some of the distortion that naturally happens and greatly added to the effect. After that, I went through four versions of the model to get things just right. The first version was just my usual rough copy that I make to get the idea out of my head and onto my computer. The second was the usual clean up but after I made a prototype I decided that it was too small and looked like a used tissue. With the third version, I fixed up the shape and made some improvements to its arms. The fourth and final version made some refinements to the geometry to simplify it in some places and give it some more shape and texture in others.
In the end, I am very happy with the model as I believe it accomplishes its goal of being creepy and cute very well. That’s because from the moment that you finish putting together the eyes - it is watching you. Each prototype felt like it was watching me as I put it together, just like it will watch you if you decide to build one. And if you build as many as I have now your house will be filled with small little ghosts, silently watching you whenever you do anything or go anywhere. Always watching…
As always, thanks for reading and happy crafting!
The Papercraftsman
Something fishy

It’s been quite a while since my last post. That’s because I’ve been so busy! Not just with my latest model, the Goldfish diorama, but because I’ve also been trying to improve in some other areas, like putting out more instructional videos and improving the quality of the SVG and PNG files.
Initially, I actually intended to make a complete fishbowl diorama complete with “glass” for the bowl and everything. I even mused about putting in a castle or a treasure chest haha. When I started modelling it however I realized I needed to scale it back or else it would just be too complex. So I went with a bunch of simple plants and two fish, similar to what made it into the final piece.
After building most of the first prototype though I realized that I hadn’t scaled it back enough as it was still too complicated. The goldfish were about half the size they are now, the plants were also a bit on the small side, and making the glass of the bowl was too finicky and resulted in a lot of ugly crinkles. So I went back to the drawing board as they say.
While I was working on the first prototype I ended up taking some WIP shots that ended up being the inspiration for the final design. I had taken a picture of one of the fish that was attached to one of the plant clusters and when I looked back on it I thought that was a much simpler idea. I also made it larger so that it would be easier to assemble compared to the first design.
The second design was simpler and turned out much better than the first. I still wasn’t quite happy with it though and ended up making some more changes. The proportions of the fish seemed a little off so I had to adjust them. For some reason, I thought it would be fine to make all of the fish and plants first and then build the base around them but this just resulted in a lot of wobbly plants and made it harder to put the base together. So I changed it so the base is built first and the plants and fish are attached using the “socket method” I developed (or at least that’s what I call it :p). That method makes things so much easier but for some reason, I don’t always think to use it right away haha.
After that I had a lot of issues taking the pictures. I’ve never considered myself a good photographer but I think I’ve at least improved a lot over the years. All of that went out the window for this project and I had to re-teach myself how to take decent photos over three separate sessions, each one an improvement over the last session haha In the end I got results that I can live with and was able to complete the project.
Now, the issue I always have is the issue of what to do next. It’s always a fun problem though as there are always many exciting new ideas floating around. I have a few that I think are a tad overdue though so I think it’s a bit simpler to decide this time. That’s probably the only clue you’ll get because, as always I won’t say what until I feel it’s time. So you’ll just have to wait patiently until then. :)
Thanks for reading and Happy Crafting!
The Papercraftsman
A Little Summer Sun

Last year, we planted some sunflowers in our garden in hopes of attracting more bees. What really ended up happening was that they grew so large that they stunted the growth of all of our veggies haha. This year we did the same thing but only planted them at the end of the garden instead of throughout and are having much better results!
Funnily enough, they also started popping up all over our yard! Last year the birds of our neighbourhood must have had a feast with all the seeds produced by the first wave of sunflowers and spread them around the yard. There were even some that appeared in the neighbour’s yards!
To me, sunflowers instill feelings of warmth and happiness, just like spending time in the summer sun with friends and family. So after being surrounded by sunflowers all summer I couldn’t help but feel inspired to re-create one out of paper.
This model ended up being much more challenging to design than I initially thought. After making the rose last year, I thought “How hard could a sunflower be? It’s such a simple, straightforward flower compared to a rose.” I ended up being pretty wrong.
The first speed bump was the petals. While they were very simple compared to the rose. The sheer amount of them took much longer model than I'd like to admit. This was mostly because I ended up tweaking and re-positioning them over and over again. At first, they looked too flat, then they’d look too curved. Then I had to adjust them so that the edges and faces didn’t overlap or intersect each other, which of course changed how they looked and started the cycle all over again.
There’s a good lesson in this that can be applied to any artform though. Eventually, you need to stop yourself and move on. With any project, you can always keep making little adjustments and improvements until you’re sick of it. What you need to realize though is that nothing is truly perfect and even if you eventually reach a point that you think is “perfect” other people might not think so. After all, “beauty is in the eye of the beholder”.
Once I stopped the cycle of petal adjustment the rest of the model design went fairly smoothly. The sepals were pretty fun to make because they didn’t really need to look neat and tidy. The stem was fairly simple to make and my design to reinforce it was much simpler than the rose. I fretted over the size of the leaves a little bit but luckily I had a lot of reference material in my backyard to help me make up my mind haha.
The final hurdle that gave me trouble was the instructions. With over 500 parts it was quite the ordeal, mostly due to how blender seems to export svgs. They aren’t very clean and are made of more lines than necessary which roughly doubles the amount of time to make the illustrations. It got to the point that I debated making an instructional video first instead but decided it would probably be just as long or longer and kept going. I have my eye on some software dedicated to technical illustrations that should greatly reduce the time spend on them as well as increase the quality. It’s pretty pricey though so it’s probably going to be a while before I can justify getting it though.
It all came together in the end though and I am very happy with the results. After all the hard work I now have a little piece of summer that will last all year. And I get to share that little piece of summer with anyone else who builds it which is also a good feeling!
As always, it’s time to move on to the next project though. I’ve got lots of ideas and I hope to share a lot more of them!
Thanks for reading and happy crafting!
The Papercraftsman
Pikachu, I choose you!
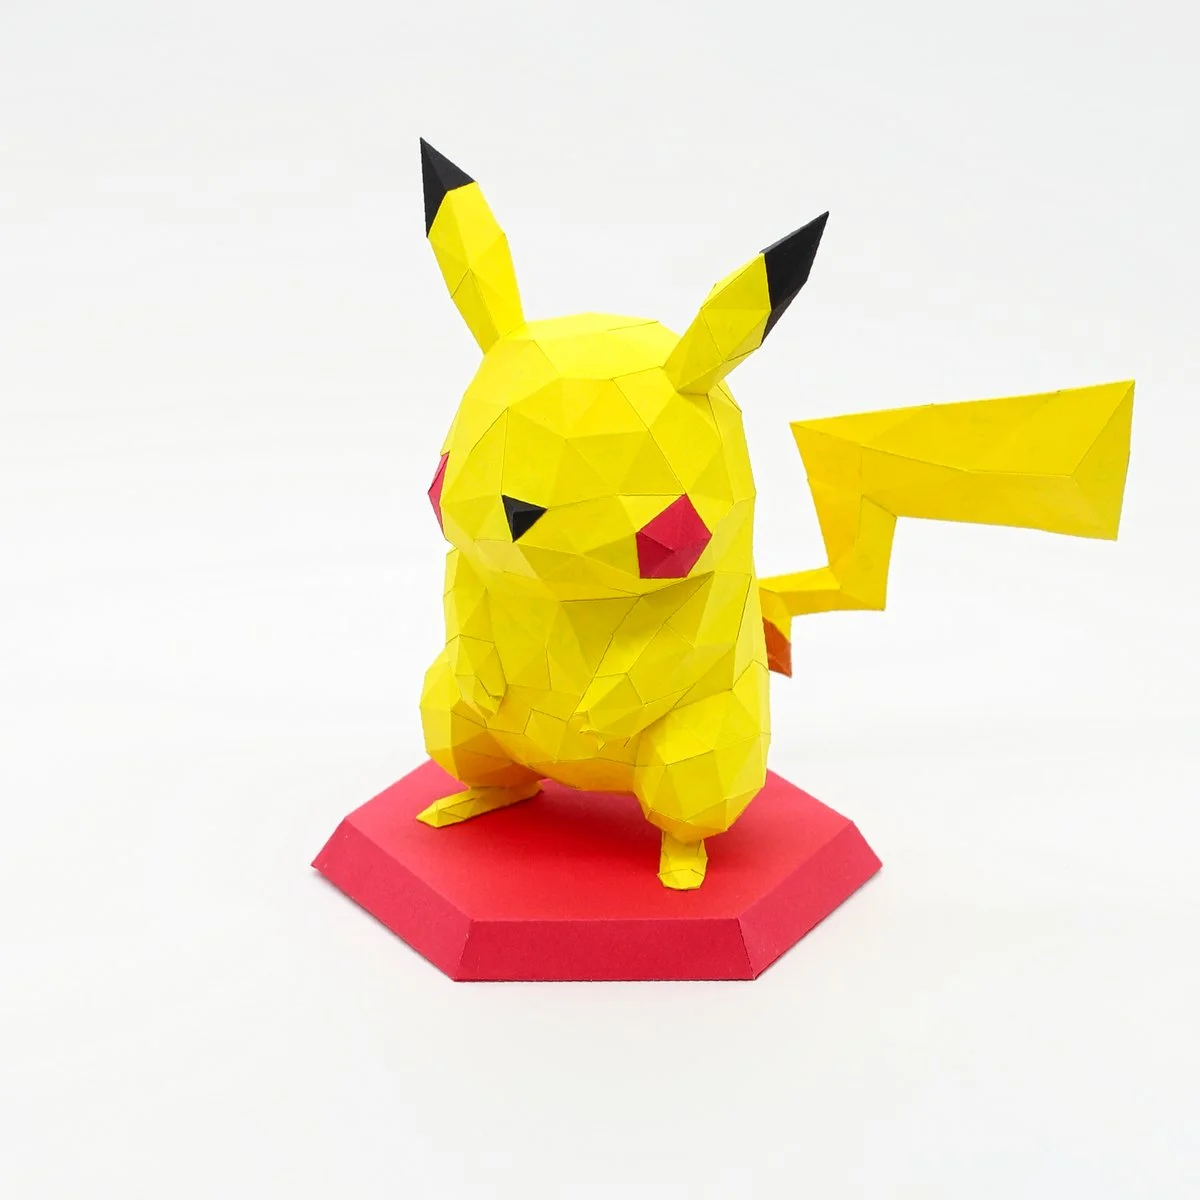
It’s Pikachu, the cute and loveable electric mouse! I had been meaning to make a Pikachu model for a while now actually but just didn’t have the confidence to pull it off.
I didn’t have much experience designing and building my own models when I first started this. I pretty much only built other people’s designs, like I’m sure most people who get into this hobby do. Eventually, though I felt the desire to explore my own creativity and make my own models.
I initially started with Pokemon because they were shapes and forms that I was very familiar with so I felt it would be easier to replicate and sort of use them as a self-teaching aid. I thought about making Pikachu right after the three Kanto starters but I felt it wouldn’t turn out as nicely, mostly because of the tail. Charmanders flame tail had actually given me some problems when I first made it and that was only the tip of the tail. Pikachus tail is pretty much all really thin so at the time I didn’t feel like it would turn out very well.
My experiences with other models with smaller parts gave me more confidence as I went on though. The Goombas eyebrows were probably the next feature that tested me a little. Then came the Rose which really made me re-think how I approach the smaller thinner bits. So when I finally got around to making Pikachu the tail wasn’t actually that difficult to deal with.
The biggest issue I had actually was simply getting him to stand up! The position of his feet and the lever action of the tail meant that there was pretty much no way for him to stand up on his own. At first, I tried weighing down his feet but it didn’t seem to be enough. I eventually decided to just put him on a little display stand and it work perfectly! In hindsight, I should have anticipated a situation like this and put all the Pokemon on stands to match. There’s nothing to say that I couldn’t make some stands for the existing models though, it really didn’t take that much time haha
This probably won’t be the first time I make a Pikachu either. One thing I have been meaning to improve on and learn is how to make my models in more interesting poses. I’m still learning on the 3D modelling side of things but I feel like I might be getting to the point I that I might need to try and learn some more features and techniques. In addition to that I got some very fun and interesting ideas from some people regarding Pikachu that I’m very tempted to try. That’s all I’m going to say here for now though haha.
Thanks for reading and happy crafting!
The Papercraftsman
The Last Metroid

Metroid has been one of my favourite series of games since I first played Metroid Prime back in 2002. There actually aren’t a lot of Metroid-themed papercrafts out there so I felt it was time to make one of the infamous creatures out of paper and change that. It’s actually no surprise that there aren’t too many papercrafts of Metroids specifically as there is a pretty obvious challenge: the membrane.
Metroid bodies consist of a clear membrane surrounding a central nucleus-like brain with some claws attached. This is something that is easy to accomplish in a video game but making it out of paper is obviously a whole other thing. The two main ideas I had were to make an arch to give the impression of shape or to use transparency film to make the membrane. After much testing and playing around with it I ended up focusing on the arch method as I felt the transparency tests weren’t satisfactory.
I think the arch method turned out very well though and I am very happy with the result. From head-on, the model resembles the Metroids from the original Metroid game for the NES. In addition, using the arch to create an impression of shape also fit with my “low-poly”, asymmetric style that also aims to give only an impression. So it worked very well for multiple reasons.
I didn’t entirely abandon the transparency method though as I did create an alternate version with a back shell to provide more shape. It also makes the model a little sturdier as well as a bit of a more challenging build too. I’m also going to keep experimenting with the transparency film to see if I can produce a better result so I may revisit this model again in the future.
Well, time to get back to designing more papercraft models. As always thank you for reading!
The Papercraftsman
A Lovely New Model
The first new model of 2022 is here! I wanted to challenge myself and with Valentine’s Day coming up I felt a Rose was appropriate. And I can safely say that this was the most difficult to design model yet.

The first challenge was to replicate how the petals of a rose naturally spiral out as they bloom. I also wanted to keep to the usual “low-poly” or “faceted” style that I enjoy. I also had to make the petals thick so that you wouldn’t see any tabs or part numbers on either side of the petals. This meant making and sorting a tangled mess of vertices that got more and more difficult as the number of petals increased. I ended up having to revise and tweak the petals a total of four times, and that was before I even cut out and assembled anything!
The stem and leaves were pretty straightforward after the complexity of the petals. The only thing I worried about was that the stem might not be strong enough to hold up the flower. I ended up making it triangular to make it sturdier but after assembling the first prototype I had to go back to the drawing board. It turned out that there are roughly three sheets of paper concentrated in a space about the size of a baseball and the strength of a triangle wasn’t going to cut it. I ended up making an internal support structure that helped immensely. I also revised how the leaves attach to make it easier to build in general and was quite happy with the result.
All in all, I think it was a good start to the year. I’ve got quite a few ideas that I’m excited to work on and share. I don’t want to give anything away but there are going to be some more video game-related ones and I have an interesting space and science-related one, if I can figure out how to do it that is.
Anyway, I should get back to designing new models. Thanks for reading and I hope you’re just as excited as I am for what’s to come!
The Papercraftsman
A Model with a Function

The holidays are here and so I felt like making something appropriate. Considering that I spend a lot of this time of year hunting for the perfect gifts for my loved ones and that I have been looking into making models that move or have some sort of function, I felt that a Gift Box was a great idea for my next model. It both looks impressive and can be used to hold a present!
From the start, the main focus of the design was on the large bow on the top. I decided to use the faceted or low-poly style because I wanted it to contrast against the uniform appearance of the actual box part of the model. The ribbon on the box is faceted for the same reason, although at first it wasn’t raised up like in my final design. I felt that raising the ribbon made it “pop” that little bit more as well as give it a touch more realism.
The biggest issue I had with this model, believe it or not, was actually the name. You see, normally when I use this asymmetrical faceted look I use the term “Low-Poly” because, in my mind, low-poly describes any model where you can easily see the individual polygons. By that definition, just about every papercraft model could be described as low-poly but I tend to reserve it for this kind of asymmetric style that draws attention to and highlights the polygons.
On the technical side of things though, low-poly literally just means low polygon which is also kind of ambiguous. If you have two models of the same thing, one with 1,000 polygons and one with 5,000, even though 1,000 isn’t a “low” amount of polygons, it is in comparison to 5,000. Knowing that is why I had difficulty deciding how to name and describe my model; while it has the faceted look I usually associate with “low-poly” things, it also has some features that have more polygons than they technically need, mainly the ribbon, so it the term didn’t feel quite accurate.
It’s a small and rather silly problem I know but it’s what I found myself thinking about while designing and assembling the model. In that sense though, this is actually probably one of my favourite models because even though it’s a relatively simple and common object it still made me stop and think about something, and that’s kind of awesome.
As always, thanks for reading and happy crafting!
The Papercraftsman
A Plump Paper Pumpkin

Fall is right around the corner so I figured it was time I made one of my favourite things of the season - a pumpkin! Every year, one of my favourite things to do is carve pumpkins for Halloween. It’s something my sisters and I have been doing for about as long as I can remember and I don’t think there has been a year that we didn’t carve any.
For this model, I decided to return to the low-poly style that I used for the Kanto starters a while back. I did this because I felt it would make the pumpkin feel more organic despite being obviously artificial. After all, I don’t think I have ever seen a perfectly symmetrical pumpkin or even one that comes close. That’s also why I made it fairly lop-sided too.
During the build, I was pleasantly surprised at how well it went together actually, in the sense that I didn’t have to constantly check where each piece went as I was building it. You see when I first make the models I don’t have instructions, I make them once I am satisfied with the end result and that the assembly process is fairly smooth and not needlessly complex or difficult. Otherwise, I would spend a bunch of time making instructions that I’m just going to have to re-do ‘x’ number of times.
With this pumpkin though I didn’t really have any issues figuring out which piece went where. I think there were only two or three that gave me a little trouble but other than that it was fine. Maybe it was a fluke or maybe I’m getting better at “cutting them up” in ways that make sense. I’m probably not the best judge though and will leave that for you to decide.
As always, thanks for reading and happy crafting!
The Papercraftsman
An Angry Little Mushroom

Completing my series of basic enemies: the Goomba has finally arrived! I think these grumpy little guys are in every main series Mario game. Easily defeated with just one jump, it kind of makes you wonder why Bowser keeps using them as minions…
This was a pretty fun model design and make. It was my second model designed using Blender and I feel like I have shown some significant improvement over the Octorok, which was my first Blender model.
In the early stages of development, I debated on keeping it symmetrical or making it asymmetrical like some of the Pokemon models I have made. Obviously, I ended up leaving it symmetrical and I am very happy with this decision!
For this model, I ended up using the sculpting tools in Blender to make a base version and then re-created the topology using that as a guide. It was actually easier to do than I thought it would be and I am very satisfied with the result. I will likely use this method going forward.
I feel like an area I still need to improve is the relative “smoothness” of the model. While I feel that I managed to learn a little bit more about how to use the smoothing and vertex alignment tools in Blender, I think I still have some more learning to do in that regard. Ultimately I just need more practice so I’m not going to beat myself up too hard.
On to positives though; I’m actually extremely please with the eyebrows of this piece! I think they make this model as good as it is. I thought about making them a thin strip of paper you glue on but I’m glad I didn’t because that would have made them stick out in a bad way. I was so worried that they would be too fragile though and that no matter how hard I tried they’d end up bent or wrecked as the rest of the model is put together, but they survived! That’s not to say they are indestructible though, I’m sure you could still wreck them if you tried haha
Anyway, with another model done means it’s time to start another! With fall right around the corner, I’ve got a few ideas rattling around my head about what to do next. You’ll just have to wait and see what comes next!
Thanks and Happy Crafting!
The PaperCraftsman
An Octorok that wont hit you with rocks

My latest model is the second in my basic enemies series. It’s an Octorok! From the Legend of Zelda series, it’s been in almost every game since the beginning. Twilight Princess was actually the first game where they didn’t appear.
I mostly based my model on the in-game designs of the Original Legend of Zelda for the NES and the Minish Cap for the GBA. The laters influence is probably the most prominent. There have been a lot of varied and interesting Octorok designs over the years but I chose those games over the others mostly because I wanted to keep things simple this time.
The main reason I tried to keep things simple was that last month I spent roughly three weeks solely on learning Blender. This model was me giving the software a good test to see what it could do and test myself and see where my skills are at. There is still more to learn and I could use some more practice but overall I think the final result turned out pretty good.
All of my previous models were designed with AutoCAD which is a program that I have years of experience with but I have been wanting to move away from it due to the cost and the fact that it’s not very good with organic shapes. Blender doesn’t seem to give you as much control over some aspects of the modelling process though so there is a bit of a trade-off but I would still say it’s a better tool for my purposes.
There are still some things I need to improve on such as the “smoothness” of the vertices. Blender has a tool to help you with that but I don’t think I used it as much or as well as I could have. I say this because I noticed some areas of the model that were a little rougher than they needed to be when I was assembling it. If I had used AutoCAD to make the same model I wouldn’t have had to worry about this as I would have started with a smooth surface and aligned my vertices to it, essentially the opposite of how you would make it in Blender. Some of the shapes, like the tentacles, might not have turned out as nice though so again there’s a bit of a trade-off.
In the end, I am very happy with this model though. I think it turned out great and it was a lot of fun to make at every step of the way and ultimately that’s what’s important; enjoying your hobbies :)
Thanks for reading and happy crafting!
The Papercraftsman
Zooming around planet Zebes

The first model of 2021 is here! It took much longer than I had anticipated but it’s finally here!
I decided to go with something from my favourite game series: Metroid. At some point, I want to do a Samus model or a Metroid or a Ridley but I don’t feel my skills are quite there yet so I decided to settle on a zoomer. It’s not the most imposing or fearsome enemy but I figured if anyone has ever even tried Metroid or Super Metroid they should recognize what it is haha.
Overall I am quite happy with how this model turned out. I probably had the most fun during the initial design process because I took a little creative license with it. When playing the original Metroid I always pictured zoomers looking very bug and crab-like than anything else and I tried to work that into my interpretation. Because of that I probably drew the most inspiration from the Metroid Prime concept art because their renderings are more bug-like than the drawings of the original Metroid. The eyes were especially fun to play around with.
As mentioned before this model took a lot longer than I had intended. Some of it was because I had to go back and re-do somethings like the eyes; they were too complex initially. Mostly though it was because with over 600 parts the instructions became a bit of a nightmare haha. Almost every day I worked on them I ended up failing to meet the progress goals I set up for myself simply because of the sheer volume of work to be done.
Unfortunately, I don’t think there is too much I can do to refine the process with my current setup as when I made my first model I approached the process of making the instructions in so many ways that I am pretty sure the way I did it is the only way I can. This means I will probably be looking at expanding my software library here to try and find a more automated way of spitting out those instructions. Until then I think I am just going to have to try and scale back the complexity of my models while I look for a solution.
With that, I think I am going to get started on my next creation. If you’re curious about what I am working on and want more regular updates then consider joining my Patreon. I tend to post more regular updates over there and even show some behind-the-scenes photos of the design and construction process.
Thanks and happy crafting,
The Papercraftsman
A chilly snowman

Here we are at the beginning of December and for those of us in the northern hemisphere, it’s time to start bundling up for the weather. So I figured I would make a model that reflects that, a snowman trying to stay warm with a toque and scarf seemed appropriate :)
I decided to go back to my low poly style for this one because I felt that it would be more appropriate for the subject. After all, when you’re a kid your snowmen never turn out perfectly round. In the end, I think it turned out pretty good. While making this model I ended up learning an important lesson that you’d think I’d have learned a lot sooner considering how many models I have made over the years; not all glue is created equal.
Normally I use an extra-strong type of glue and was pretty much out after completing the candy cane model. When I went to my local craft store to get more I was disappointed to find out they were sold out and decided to get a lower quality glue from the same brand thinking, “Glue is glue. What difference could there be?” When I got to the point where I needed to assemble the snowman I realized how foolish that thought was.
The new glue was runnier, dried faster, didn’t dry as clear, and warped the paper ALOT when it dried. I got most of the toque done before I gave up and went searching for a new bottle of my old glue, making sure to grab extras. In hindsight, I should have taken pictures to better explain what I am talking about but I didn’t think of that until after I had thrown out my first attempt.
The two most important factors for me were the fast drying and paper warping. The fast drying was terrible because by the time I had finished applying glue to the whole tab it was nearly dry and wouldn’t stick together. Good glue still has a chance to warp the paper if you use too much but this stuff was awful, it immediately wrinkled the tabs, making a nice clean attachment almost impossible.
So the moral of the story is that glue matters. If you have a brand or type that you like, don’t settle for anything else!
Thanks and happy crafting,
The Papercraftsman
Sweet and Simple

As we enter the holiday season I figured it would be nice to start with something simple. I don’t have a lot to say about this model other than that actually.
I actually made two versions of this initially but only finalized one. This was another triangles vs squares test essentially and in this case the triangles won, mainly because of the spiral. Both looked nice but the spiral looked significantly more uniform and smooth on the triangle grid.
I’m sure I could have achieved the same results with the square grid but that would have needed more tweaking to get the proportions right. So I just decided to go with version that didn’t need any adjustments and here we are.
I’ve got one more seasonal model I am hoping to get done before Christmas and then I am going to try and do another video game model for January/February.
Thanks for reading and happy crafting, and happy holidays,
The Papercraftsman.
Not very spooky

Here we are in late October, the leaves have changed colour and there is a frosty chill in the air. That’s when people want to see cute little ladybugs, right? I know it’s not very fitting with the season but I’m the type of guy that likes to finish what I start, so when the idea popped into my head halfway through the bee I felt the need to see it through to the end.
Overall, I’m pretty happy with how this one turned out. I have been messing around with using triangular grids for the models and tried to apply some of what I learned to this one. It’s probably most evident in the eyes which I’m sure people will agree look much better than the bees eyes which are a tad blocky.

I’m not sure how often I will use them in the future though as I find does significantly increase the polygon count, which also increases the amount of potential parts, which increases the amount of cuts and folds required. All of that is fine for me to do, I personally don’t mind the added complexity, but I am always thinking about other potential builders. I know not everyone wants something so “involved” especially if they’re just getting into papercraft so I always try and keep that in mind. I could always just be overthinking things though haha
Thanks for reading and happy crafting,
The Papercraftsman
A buzzing little bee.
My latest model is a cute little bee!

I felt I needed to do something a little simpler compared to my previous models as well as make something that was completely my own design. I also decided to make this my first “premium” model as well, a term I’m not thrilled with to be honest, but it was the only thing I could think of at the moment. I still plan on making free models though, so don’t worry if you don’t have money to spend on papercraft! Generally, going forward if anything I make is based of an existing copyrighted design it will be free and if it’s my own design there will most likely be a price attached to it. Anyway, back to talking about the bee!

I was mostly inspired by the beehive in my sisters backyard. She let a local apiarist store a hive there this summer and it was very interesting to say the least. Whenever I was over there visiting I would spend some time observing them coming in and out of the hive. It’s oddly calming watching a bunch of tiny insects go about their tiny lives. At a glance, it seems like chaos but at the same time you know there is a function and purpose to it. Hundreds of tiny bees, each with a task to perform in order to keep the hive functioning. They don’t need to be told what to do or how or when to do it, they just instinctively know. I’m still not really sure why, but thinking about that is what felt so calming.
I also figured that each bee must be pretty content in its role in the hive which is what I tried to convey in my papercraft pattern. I gave it a small like smile that says “I’m happy” and small little legs that look like they’re relaxed and dangling. Combined with the bulging eyes and rotund body these features result in a bee that looks like it doesn’t have a care in the world, content to just go about it’s tasks.
Thanks and happy crafting,
The Papercraftsman
Squirtle
A brief discussion of my Squirtle papercraft model.
Read MoreCharmander
A brief look at my thoughts on one of my papercraft creations.
Read MoreBulbasaur
A brief discussion of my Bulbasaur model
Read More